

The single biggest reason dog boots end up back in the closet after one walk isn't that the dog "just hates boots." It's that the boots don't fit properly, or the dog was never given a chance to get used to them. Both problems are fixable, and neither requires an expensive product, they require doing the measuring and the training properly, in that order.
Why fit matters more than brand or price
Dog paw shapes vary enormously between breeds, and even between the front and back paws of the same dog. A boot that's the right length but too wide will let the paw shift around inside it with every step, and that shifting is exactly what causes rubbing, slipping, and boots that twist sideways or come off entirely. A boot that's too narrow will pinch and the dog will spend the whole walk trying to shake it off. No amount of strap-tightening fixes a boot that's fundamentally the wrong size, so getting the measurement right the first time saves a lot of frustration and returned orders.
Step 1, Measure the paw, not the dog's weight
Most sizing problems start here: owners size boots off the dog's weight or breed name alone, when almost every manufacturer's chart is actually built around a paw width or length measurement in millimetres or inches. Weight-based estimates on a listing are a rough starting point at best, since a stocky 20kg dog and a lean, long-legged 20kg dog can need noticeably different boot sizes.
To measure properly:
Step 2, Match your numbers to the actual chart, not a generic size label
Once you have measurements, go to the specific product's sizing chart rather than relying on a general "small/medium/large" label, since those labels are not standardised across brands and a "medium" from one seller can be a "large" from another. If your paw width falls between two sizes, sizing up is usually the safer call for length (to leave a little toe room) while staying true to the measured width, since a boot that's too narrow is harder to fix than one with slightly more room in it.
Step 3, Check the fit properly once the boots arrive
Don't judge fit by whether the boot goes on, almost any boot can be forced onto a paw. Check instead for:
- A little room at the toe, but not so much that the paw slides forward and back inside the boot
- The strap or closure sitting snugly around the leg above the paw without pinching, with enough room to slide a finger underneath
- No gapping at the top of the boot that would let debris, snow, or water in
- The dog being able to bear weight and walk with a roughly normal gait rather than a high-stepping "shaking off something sticky" walk (some initial odd walking is normal in the first sessions, more on that below, but it should ease as they adjust)
Why boots actually fall off, and how to stop it
Even a correctly sized boot can come off if a few other details aren't addressed:
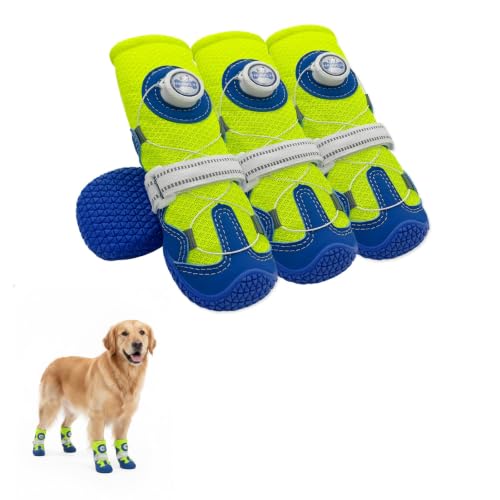
- Loose or single-point straps. A single Velcro strap works loose faster than a boot with two points of closure or an adjustable ankle cuff. If your dog is an escape artist, look for boots with a secondary strap or a drawstring-style closure for extra security.
- Dew claws catching on the boot opening. Dogs with dew claws (the small extra toe higher up the leg) can sometimes catch the top edge of a boot and pull it loose; check that the boot sits below or clear of the dew claw.
- Wet or muddy ground creating suction that pulls boots off as the paw lifts, which is more about terrain than fit, there's not much to do here beyond accepting some boots may need re-securing mid-walk in sloppy conditions.
- A dog who simply hasn't been trained to walk in them yet, which is by far the most common and most fixable cause.
The acclimation process, why most "boots don't work" complaints are actually a training gap
Almost every dog looks awkward and high-steps or freezes the first time boots go on, this is a normal reaction to an unfamiliar sensation on the paws, not a sign the boots don't fit or that the dog can't be trained to wear them. Rushing straight to a full walk is what causes most boots to get shaken off or refused going forward.
A gradual process works far better:
Skipping straight to a big hike or long walk in brand-new boots is setting the training process up to fail, the awkwardness a dog shows on day one is not permanent, but it does need a few short, low-pressure sessions to work through.
A quick sizing sanity check before you buy
If you're between sizes, unsure about your dog's paw shape, or buying for a breed known for unusual paw proportions, it's worth reading the specific product's buyer reviews for sizing feedback before ordering, since that real-world feedback often flags fit quirks that a chart alone won't show.