



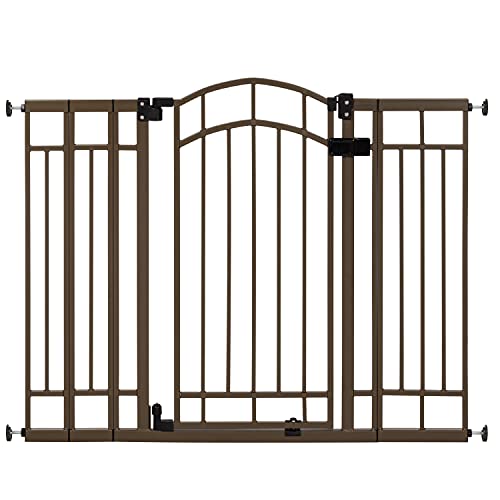
The mounting method is a safety decision, not a style choice
Most people shop for a dog gate by looking at height, color, and price, and only think about the mounting method once the gate arrives and it's time to install it. That's backwards. Where the gate is going in your home should decide the mounting method before you even open the product listing, because the two methods hold in physically different ways and one of them is not rated for every location.
How a pressure-mount gate actually holds
A pressure-mount gate has a tension bar or twist knob that pushes spring-loaded end caps outward against the door frame or wall on either side. It's held by friction and compression alone, nothing is fastened to the structure. That's what makes it fast to install and easy to remove without a mark left behind, but it also means the hold degrades under repeated force. Every time a dog leans, jumps, or barrels into the gate, the rubber or plastic end cups compress slightly and can walk loose over time, especially on textured trim, uneven walls, or door frames that flex a little in their casing. A pressure-mount gate that was tight on install day can be measurably looser a few months later without anyone touching the tension knob, which is exactly why manufacturers tell you to recheck and retighten it periodically.
Where pressure-mount is genuinely fine
A doorway between two rooms, a hallway, or the bottom of a staircase are all appropriate places for a pressure-mount gate. The common thread is that if the gate does fail, the dog ends up on a flat floor, not falling. That's the entire safety logic of the category, and it's worth holding onto as the test for any location you're considering: if this gate gave way right now, what would the dog land on or in?
Why the top of a staircase fails that test
At the top of a staircase, a dog leaning its full body weight against the gate while looking down the stairs is a very different load than a dog nudging a hallway gate. If a pressure-mounted gate loses its friction hold in that spot, the result isn't an escaped dog, it's a fall down a flight of stairs. No manufacturer rates a pressure-mount gate for this location, and it's not a case of buying a heavier-duty pressure gate to compensate. The mounting method itself is the wrong category for that spot, regardless of how strong the gate's frame is.
Installing a hardware-mount gate correctly
Hardware-mount gates screw directly into the structure, which is what makes them safe for stair tops. Installation takes more effort than a pressure-mount gate, and doing it properly means a few extra steps:
- Find a stud or the newel post first. Screws driven into hollow drywall or thin trim alone will pull out under load. Use a stud finder on wall-mounted installations, or anchor into the stair newel post (the thick vertical post at the top of a banister), which is structural and built to take load.
- Use the mounting cups the gate includes. Most hardware-mount gates ship with small plastic or metal cups that get screwed to the frame first; the gate then clips into the cups rather than being screwed to directly. This lets you remove the gate itself without removing the hardware.
- Pre-drill pilot holes slightly smaller than the screws provided, especially in hardwood trim, to avoid splitting the wood.
- If one side has no stud, common on the open side of a staircase where there's a banister instead of a wall, look for a banister or spindle mounting kit. These clamp around the newel post or spindles with a bracket rather than needing to drill into hollow balustrade, which is the correct way to hardware-mount to a staircase that doesn't have a wall on both sides.
Measuring for either method
Measure the opening at both its narrowest and widest points, top and bottom of a door frame, or top and bottom of a staircase opening, since framing and banisters are rarely perfectly square, and use the smaller number as your working width. For hardware-mount gates specifically, also check the depth of any baseboard or trim molding the gate's mounting arms will need to clear; a gate that fits the wall-to-wall measurement can still sit crooked if trim depth wasn't accounted for.
Convertible gates and mixed-method households
Some gates are designed to work either way, with the same frame usable as a pressure-mount gate in a doorway and reinstalled with the included hardware kit at a staircase. This is worth knowing if you need gates in multiple locations with different requirements: rather than buying two entirely different products, one convertible gate model installed two different ways can cover both a doorway and a stair top, provided you actually use the hardware kit at the stairs rather than defaulting to the faster pressure-mount setup out of convenience.
Renters and hardware-mount gates
Drilling into trim is a real concern for renters, but it shouldn't lead to using a pressure-mount gate at a stair top to avoid it, that trade-off isn't worth making. A banister clamp kit that fastens to the newel post or spindles rather than drilling into wall trim is usually the better renter-friendly path for a staircase specifically, since it avoids drywall holes while still providing a genuine hardware-mount hold. For doorways, small mounting-cup screw holes are typically easy to fill and touch up at move-out.
A periodic check worth doing
Whichever method is in place, build in a habit of checking it. For pressure-mount gates, retighten the tension knob and inspect the end cups for wear or denting every few weeks. For hardware-mount gates, check that screws haven't backed out and that mounting cups are still seated firmly. A gate that was installed correctly six months ago isn't guaranteed to still be installed correctly today.