


Start with the harness, not the stake
The single biggest safety decision in any tie-out setup is what the cable clips to. A well-fitted harness spreads a sudden jolt across the chest and shoulders; a flat collar concentrates the same force on the neck and throat, which is where most serious tie-out injuries happen. If you only change one thing about how you set up a tie-out, switch from collar to harness.
Choose and seat a secure stake at the right anchor point
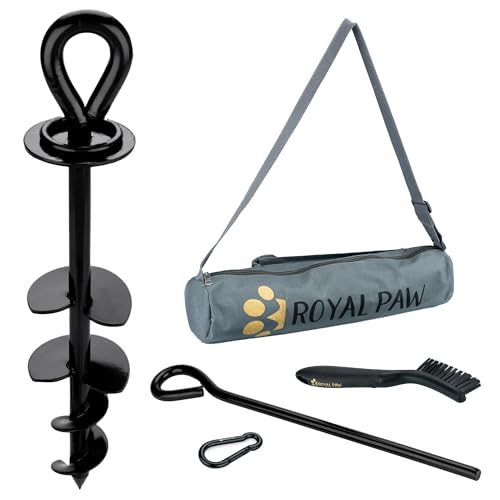
Pick a secure stake rated well above your dog's weight, and drive it fully into the ground at an anchor point clear of foot traffic, angled or twisted in as the design requires, not left sitting loosely on top. Give it a firm test pull in the direction your dog is likely to run before clipping anything to it. If it shifts under your own hand, it will not hold against a real lunge.
Clear the area before you clip the dog on
Walk the full radius the cable allows and remove or note anything it could catch on: garden furniture, hoses, fence posts, shrubs, a second dog's tie-out line if you have more than one dog outside. Strangulation risk on a tie-out comes overwhelmingly from tangling around obstacles or the dog's own legs, not from the cable itself, so clearing the area does more for safety than almost anything else on this list.
Use swivel hardware for tangle prevention
A swivel clip at the anchor and another where the line meets the harness is the simplest form of tangle prevention, stopping the cable twisting tighter each time the dog circles. Keep the cable length matched to a clutter-free radius, and inspect the clips, cable, and harness stitching periodically, worn hardware is a hidden failure point that's easy to miss until it fails at the wrong moment. Check the line each time before use, not just when you first set it up.
Favour short sessions over long ones, and set up shade and fresh water within reach if the dog will be out more than a few minutes. Supervision means staying close enough to step in immediately if the dog tangles, another animal approaches, or the weather turns. A tie-out set up perfectly but left unsupervised still carries real risk, good hardware reduces the danger, it doesn't remove the need to watch. That's also why the choice of collar vs harness matters more than it looks: it's a direct safety decision, not just preference.
A quick pre-use checklist
Harness fitted correctly, anchor tested with a firm pull, swivel clips on both ends, obstacles cleared from the radius, shade and water available, and you're staying within sight for the whole session. Running through that list each time takes under a minute and closes off most of the ways a tie-out setup goes wrong.
The first couple of sessions tell you a lot about whether a setup is actually working. Watch whether your dog tends to circle a particular obstacle, wind the cable up short, or repeatedly hit the end of the line at speed, each is a sign to move the anchor, shorten the radius, or reconsider the tool entirely. Ground conditions shift with weather and hardware wears with use, so treat the checklist as something you repeat every time, not just the first time you set the tie-out up.